
All in one! Software | Domains | Hosting | Servers
Centos GUI installation
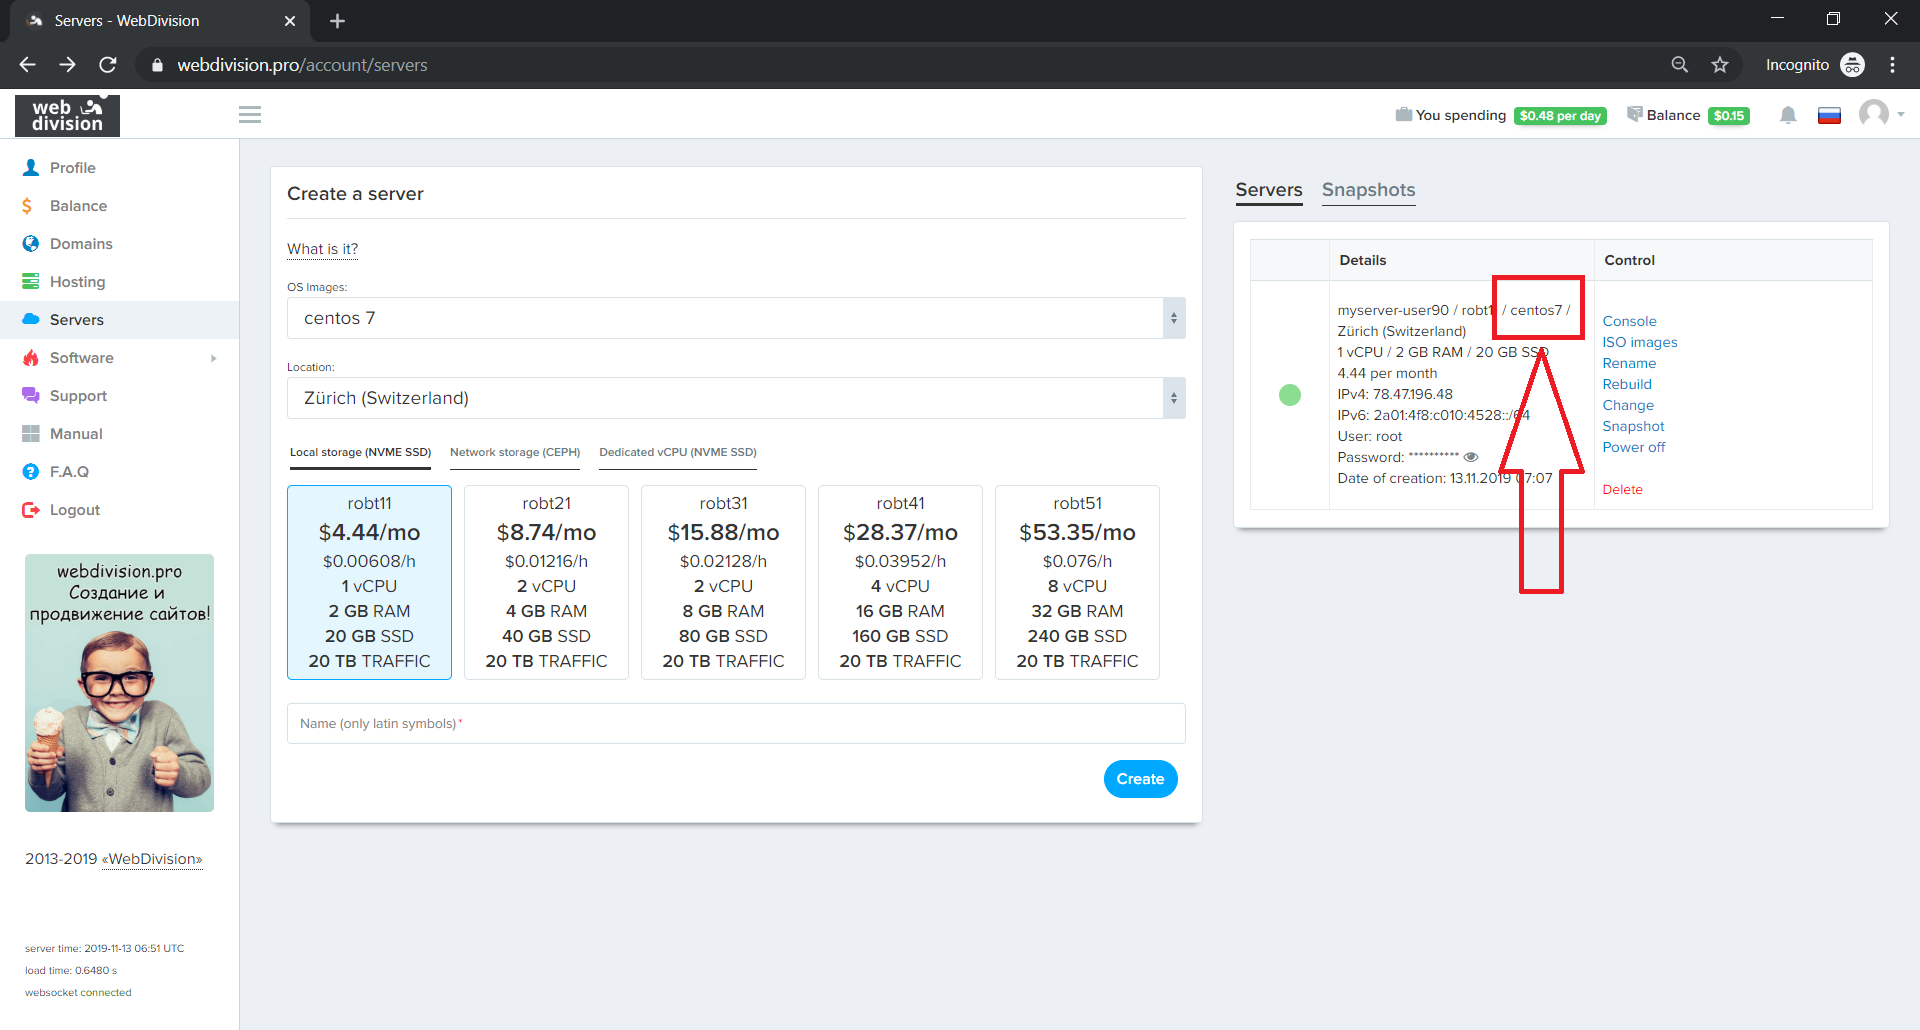
Buy a server, for example, robt11 with the Centos 7 operating system. Enter any name and click the Create button. In less than 10 seconds your server will be ready and you will see it on the right in the server list:
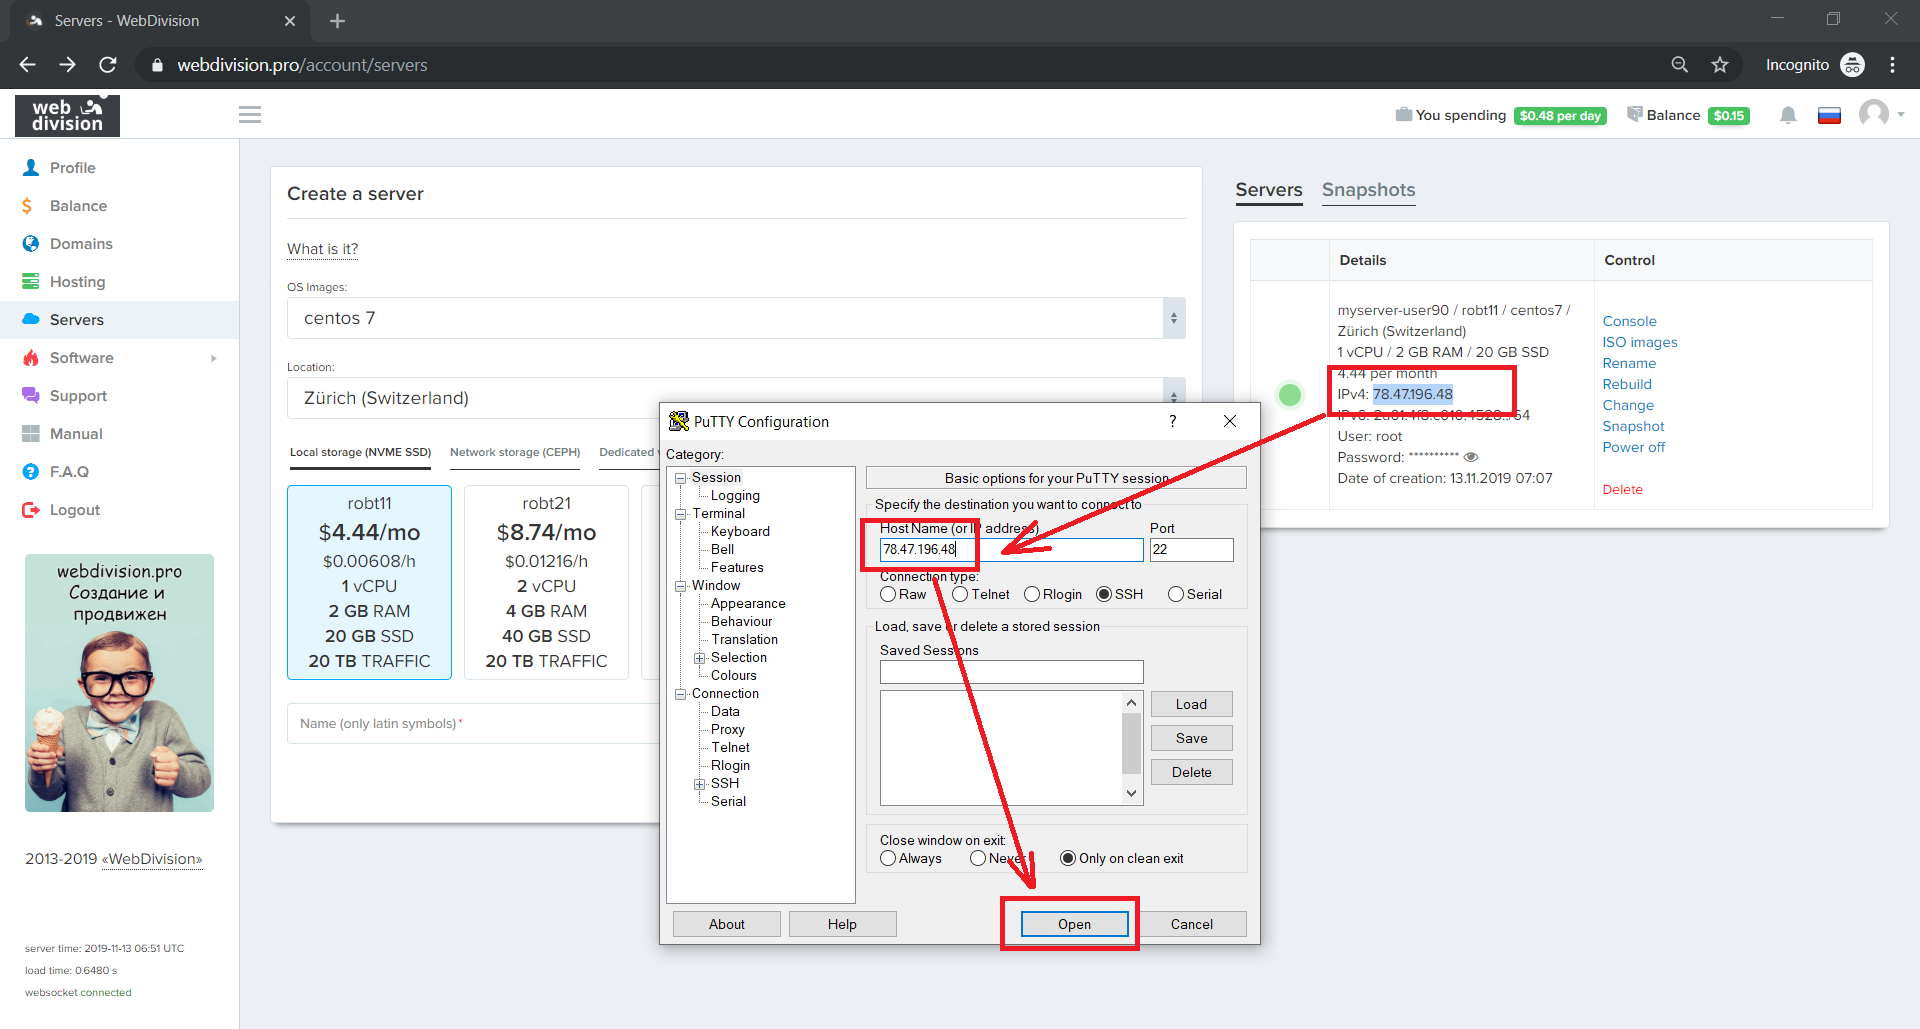
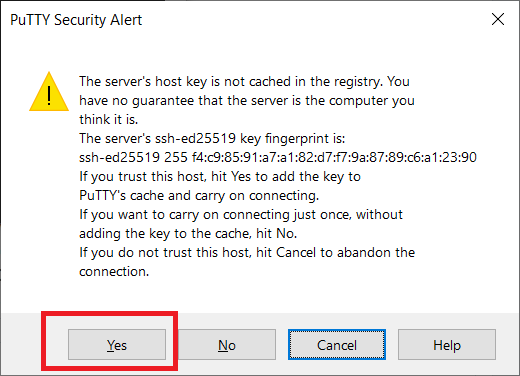
Then you can do all the actions in the browser console of the server, but you cannot copy information into it, so for convenience we download putty.org and connect to our server via SSH:
1. Enter the username and password.
2. When you first log in for security, the server will ask you to change the current password, enter the current password first.
3. Enter the new password with confirmation.

Install the graphical shell with the command and press Enter on the keyboard:
yum -y groupinstall kde-desktop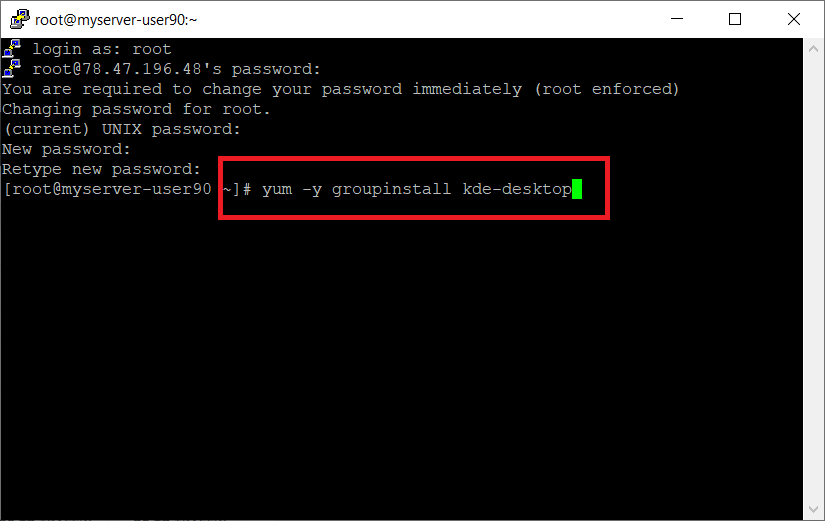
We restart the server with the command:
rebootConnect to the server again via Putty and enter the command to install the program, which is necessary to connect to the installed graphical interface:
sudo yum install -y tigervnc-serverNext, configure the tigervnc-server. We copy settings with the command:
sudo cp /lib/systemd/system/vncserver@.service /etc/systemd/system/vncserver@:1.serviceEditing Settings with the command:
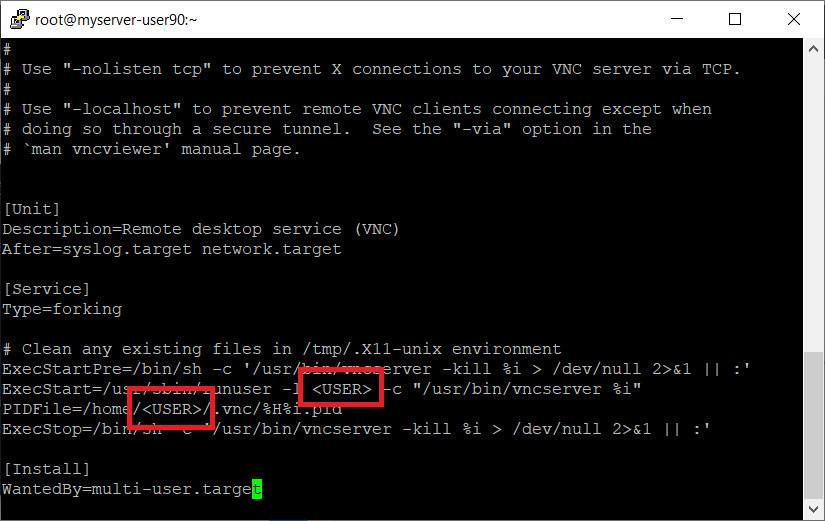
sudo vi /etc/systemd/system/vncserver@:1.service
After opening the file, press the i button and change the file, in order to save the file, press Shift +: (colon on the keyboard) and enter the command: wq
Instead of USER (along with quotes) we just insert root:
Execute commands:
sudo systemctl daemon-reload
sudo systemctl enable vncserver@:1.service
sudo firewall-cmd --permanent --zone=public --add-port=5901/tcp
sudo firewall-cmd --reload
vncserver
1. We create a password for connecting to a remote graphical interface.
2. Type n and press Enter.
Execute commands:
sudo systemctl daemon-reload
sudo systemctl restart vncserver@:1.service
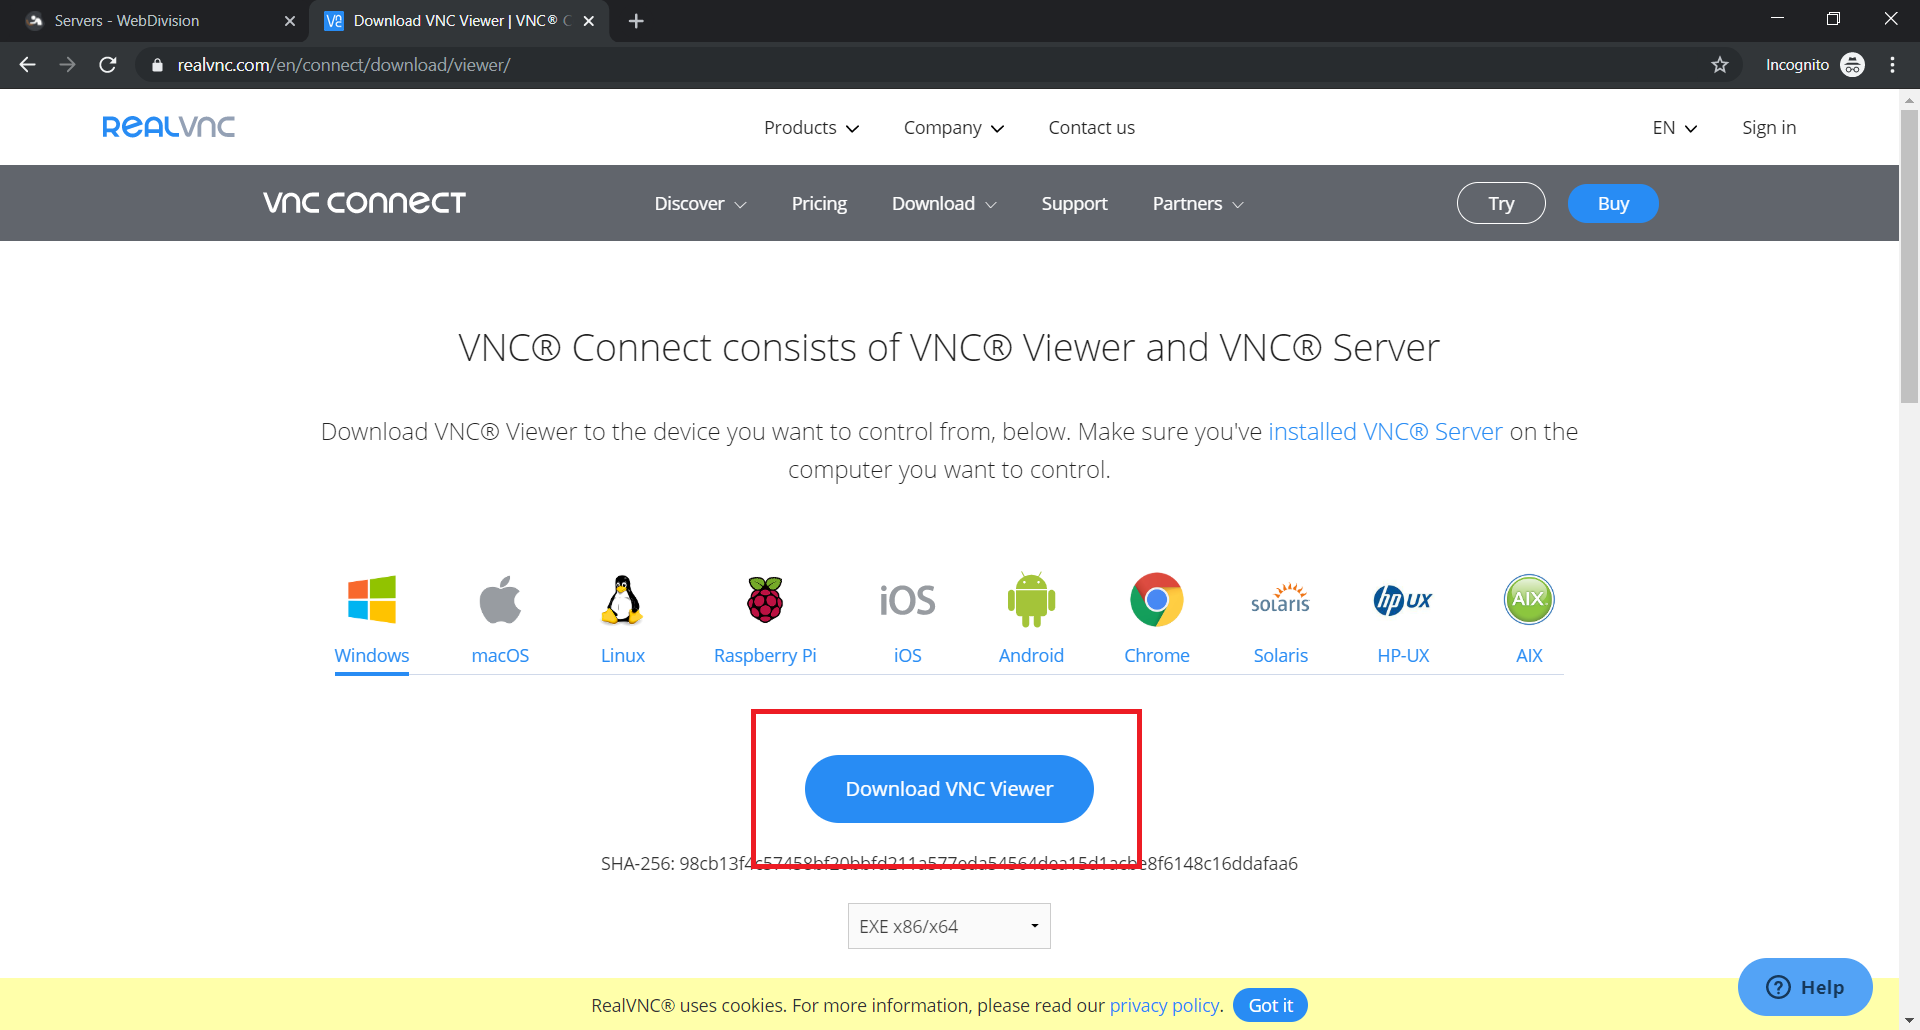
Download the program to connect to the graphical interface realvnc.com:
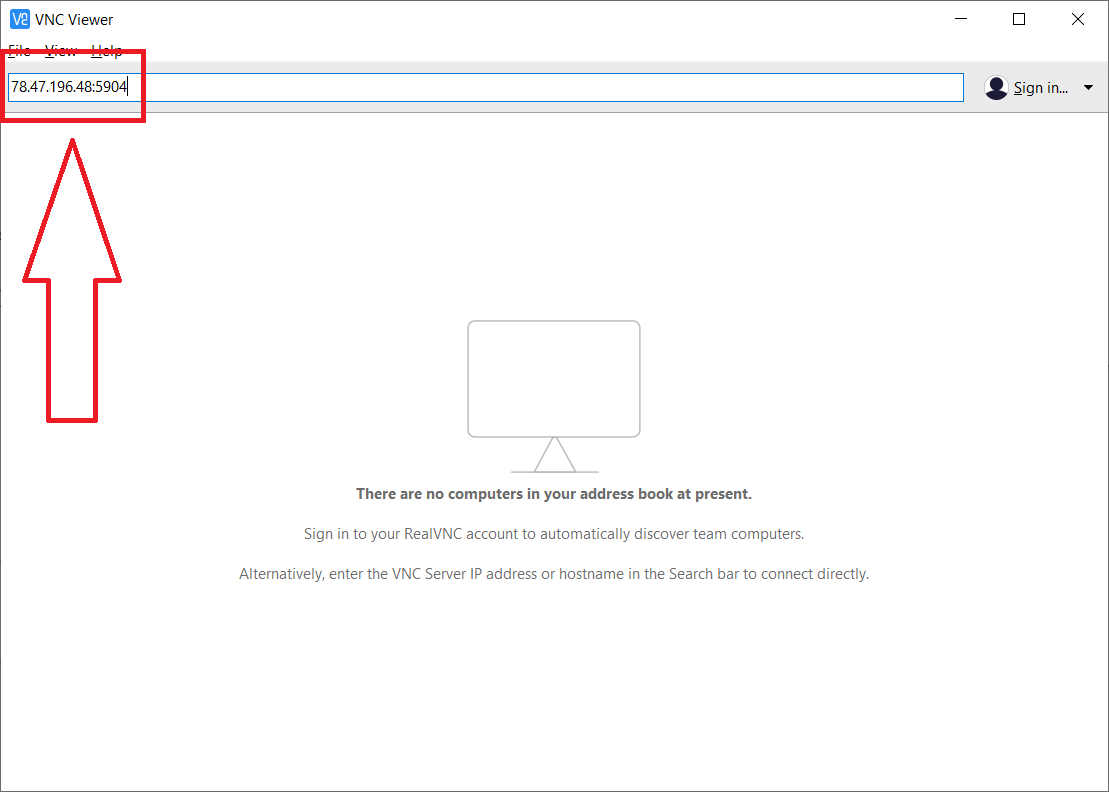
Connect to GUI to 5901 port (the image 5904 is wrong):
If there is an error, then check the vncserver status using the command:
systemctl status vncserver@:1 -l
If the vncserver is not active, then use the command:
rm /tmp/.X11-unix/X1
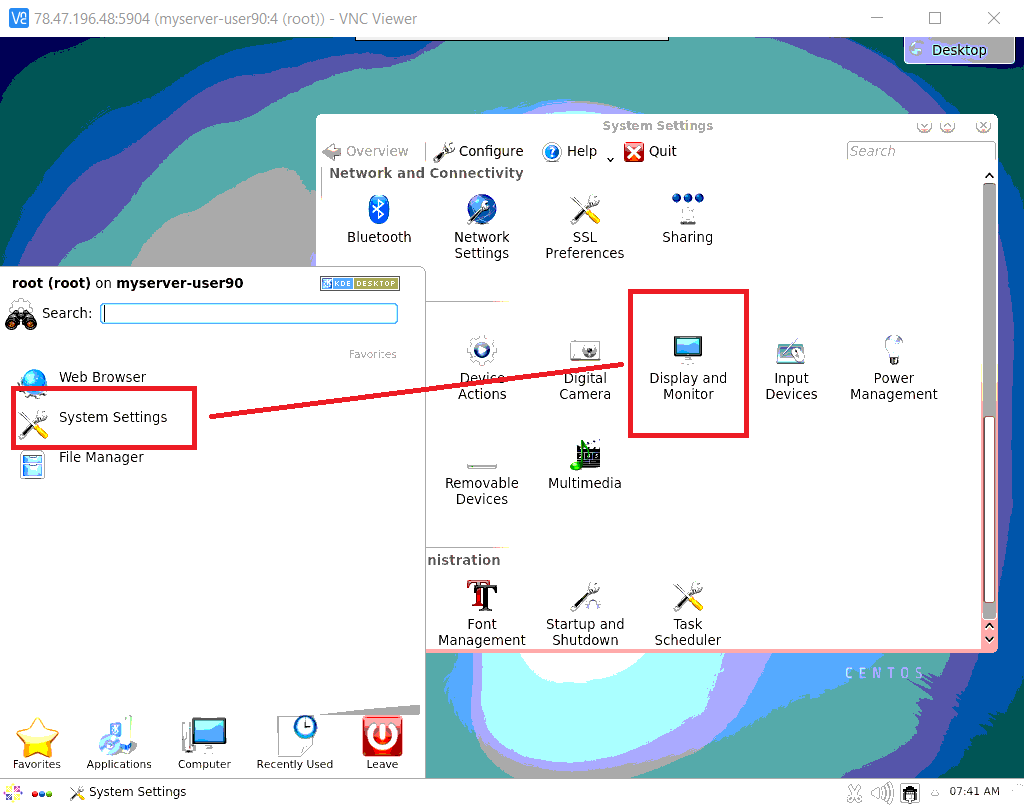
You will see if everything was done correctly:

Quick installation of the Firefox browser from the console:
yum -y install firefoxApplication search:

Change screen resolution:
To install Java, run the commands in the console:
yum -y install wget
cd /opt/
wget --no-cookies --no-check-certificate --header "Cookie: " "https://webdivision.pro/assets/files/jdk-8u211-linux-x64.tar.gz"
tar xzf jdk-8u211-linux-x64.tar.gz
cd jdk1.8.0_211/
alternatives --install /usr/bin/java java /opt/jdk1.8.0_211/bin/java 2
alternatives --config java
alternatives --install /usr/bin/jar jar /opt/jdk1.8.0_211/bin/jar 2
alternatives --install /usr/bin/javac javac /opt/jdk1.8.0_211/bin/javac 2
alternatives --set jar /opt/jdk1.8.0_211/bin/jar
alternatives --set javac /opt/jdk1.8.0_211/bin/javac
java -version
export JAVA_HOME=/opt/jdk1.8.0_211
export JRE_HOME=/opt/jdk1.8.0_211/jre
export PATH=$PATH:/opt/jdk1.8.0_211/bin:/opt/jdk1.8.0_211/jre/bin
Do you click on the Java program shortcut and the program does not start? Perhaps you need to specify the path to the Java program that will run the Java programs (archives). Right-click on the Java program (archive) -> Properties -> File Type Options -> Remove everything from the Application Preference Order -> Add -> Enter /usr/bin/java -jar -> Ok.